RedX + WooCommerce for Bangladesh COD stores
RedX serves a wide mix of Facebook shops and WooCommerce COD brands with competitive rates on many district routes.
The operational bottleneck is the same as every courier: manually copying customer details into the RedX merchant panel after each confirmation.
Typos in phone or area codes trigger failed attempts, return penalties, and angry customers waiting for parcels that never arrive.
This RedX courier guide explains how to collect API credentials from the RedX merchant panel, connect them in WooEasyLife, map your pickup location, book parcels from WooCommerce (single or bulk), store tracking IDs on orders, and sync status for automated customer alerts.
Run BD Fraud Checker and Fake Order Protection before you auto-book risky COD numbers.
Bangla version: RedX courier guide. Full ops context: English WooCommerce guide. Confirm → book workflow: Courier Auto Entry.
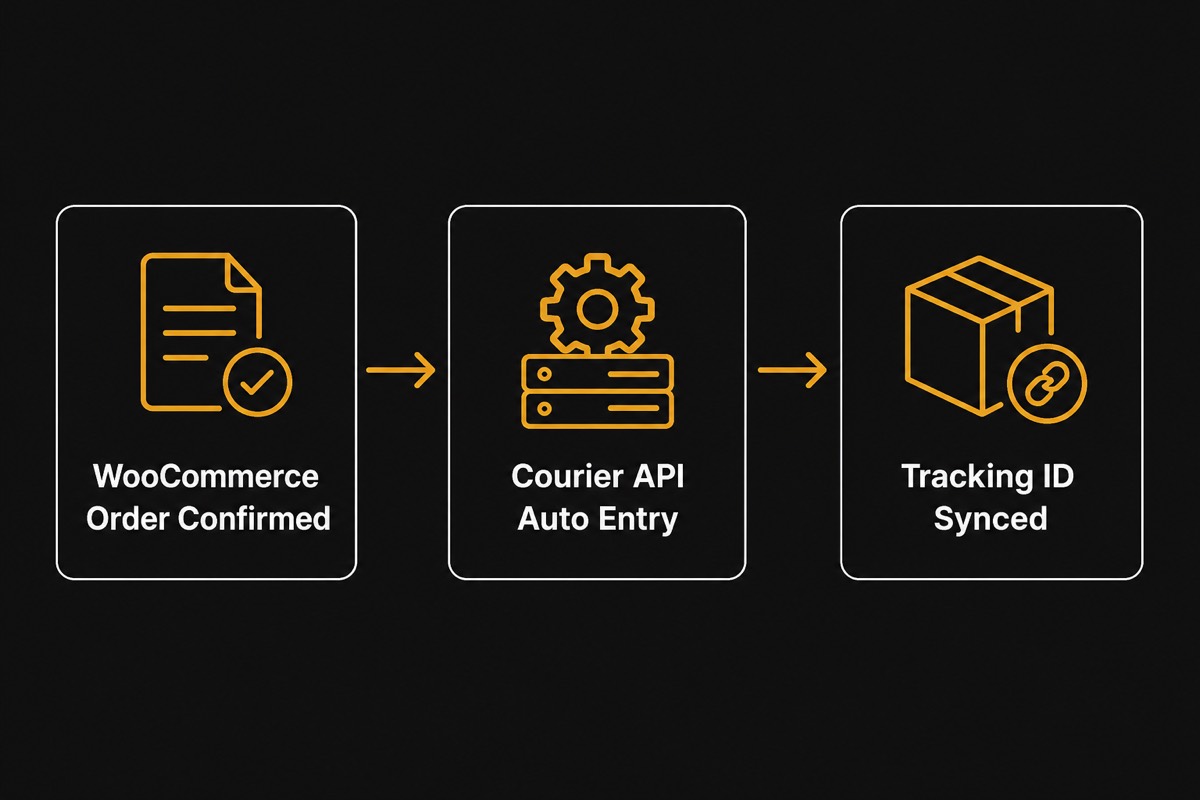
Why RedX API integration beats manual merchant panel entry
Manual RedX booking at 40+ orders per day means constant tab-switching: WooCommerce order → RedX panel → paste name, phone, address, weight, COD → wait for tracking → paste back.
Staff fatigue causes wrong COD amounts, duplicate entries, and parcels booked to outdated addresses after a customer edits checkout notes.
RedX API integration sends validated order fields from WooEasyLife after you confirm. RedX returns a tracking/consignment ID attached to the WooCommerce order.
Status updates can flow back for notifications and RTS handling. Result: roughly 90% less booking time, fewer typos, and one source of truth for which orders already shipped.
Compare RedX versus other couriers on your city mix with Courier Charge Calculator. If return fees already hurt margins, run the numbers on Return Loss Calculator before you scale RedX automation.
RedX API token/key from the merchant panel
RedX issues API credentials through the merchant panel—typically an API token/key pair or equivalent access credentials depending on your account type.
Log into the RedX merchant dashboard, open the API or Developer section, and collect the API token/key values shown there. RedX may label fields differently across account tiers; copy exactly what the panel displays.
Keep credentials private and rotate them if a team member with panel access leaves. In WooEasyLife open Courier Settings → RedX, paste the API token/key, enable RedX, and run a connection test.
Then set your default pickup store/warehouse so RedX parcels inherit the correct hub context.
A failed connection test with valid-looking credentials usually means API access is not yet enabled on the RedX account—contact RedX support or your account manager before retrying.
After green status, book one test parcel before bulk mode.
Step-by-step: connect RedX to WooCommerce
1) Ensure your RedX merchant account is active and API access is enabled. 2) Collect API token/key from the RedX merchant panel. 3) In WooEasyLife → Courier Settings, enable RedX and paste credentials.
4) Map default store/warehouse location. 5) Run connection test. 6) Confirm a test order, send to RedX, verify tracking ID saves. 7) Enable tracking message templates on Notifications automation.
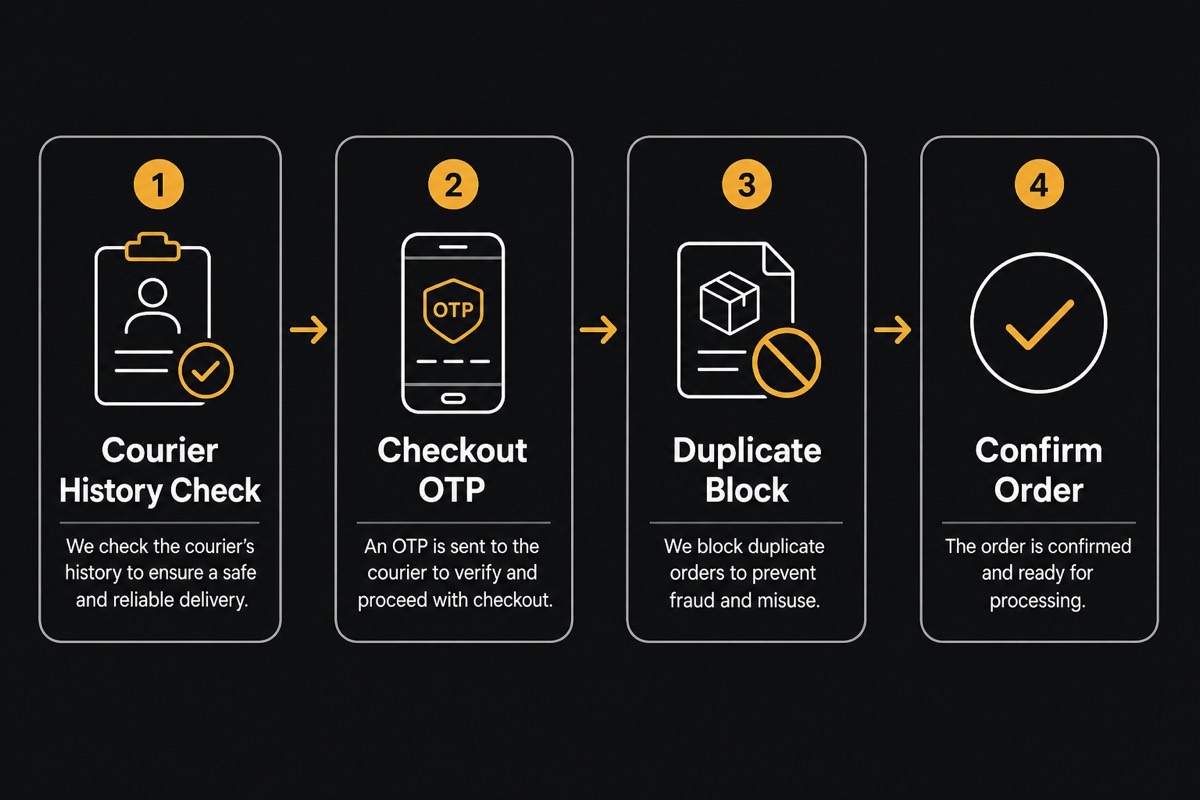
Safety order matters: BD Fraud Checker for courier history → Fake Order Protection for OTP and blacklists → RedX auto entry on confirm only.
Shipping unverified COD because “RedX is connected” multiplies return loss faster than manual booking ever could.
Running multiple couriers? Pair this guide with Steadfast integration and Pathao courier guide. Pick a default courier per zone so packers and booking staff follow one clear rule.
Confirm → RedX auto entry and bulk send
Target workflow: new order → fraud zone check → call/OTP if needed → confirm → WooEasyLife pushes structured data to RedX → tracking ID on order → label print → pickup. Staff stop living in two panels for every parcel.
Bulk booking: select confirmed orders in WooCommerce and send to RedX in one batch. Enable bulk only after single-order flow is reliable.
Export or review failed bookings—bad area codes, empty phone fields, COD mismatches—fix the order, then retry once to avoid duplicate consignments.
On-the-go merchants can confirm or hold from WooEasyLife mobile app, then trigger RedX entry after approval. Recovery and tracking automation still live in Notifications automation.
Address mapping, weight, and COD accuracy for RedX
RedX booking quality depends on clean address data. Map WooCommerce city, zone, and area fields (or custom checkout fields) to values RedX accepts.
Vague addresses—“beside school, Bogura”—fail validation or route to the wrong hub.
COD amount must match what the rider collects, including any delivery charge you promised. Mismatch creates disputes at the door and reconciliation headaches later.
Keep product lines and shipping fees consistent before confirm.
Add short product or weight notes on high-SKU orders so RedX entry and packing stay aligned. Plan charges ahead with Courier Charge Calculator when testing new routes.
Tracking sync, notifications, and return handling
Store RedX tracking/consignment IDs on each WooCommerce order.
Automated In Transit and Out for Delivery messages cut “where is my order?” tickets and reduce customer-unavailable returns because buyers expect the rider call.
Set up WhatsApp-first templates with SMS fallback on Notifications automation. Include order ID, COD total, and a tracking link.
When RedX marks RTS or cancel, restock and flag the order so COD return reduction workflows stay accurate.
Branded tracking on your domain (optional) keeps customers on your site and opens room for upsell while support load drops.
Verify customers before RedX auto-booking
RedX API speed is an advantage only after verification. Pull courier success history on BD Fraud Checker: green (roughly 80–100% success) can ship COD quickly; yellow (50–79%) needs call confirm or OTP;
red (under 50%) should see advance fee prompts or hold via Fake Order Protection.
Ten red-zone parcels shipped on autopilot can cost more in reverse fees and packaging than dozens of green-zone deliveries earn. Automate RedX for clean orders; add friction for risky ones.
See English WooCommerce guide for the full fraud stack. Quantify exposure with Return Loss Calculator before increasing ad spend on COD campaigns.
Troubleshooting RedX API issues
Auth failures: re-copy API token/key from the RedX merchant panel, confirm API access is active, and update WooEasyLife if RedX rotated credentials. Trailing spaces in pasted keys are a common silent failure.
Area or city rejections: validate checkout mapping or collect a clearer address from the customer. Duplicate parcels: check for an existing tracking ID before resending.
COD errors: reconcile order totals, then rebook once.
Cross-check Steadfast patterns on Steadfast integration or Pathao on Pathao courier guide. Daily ops overview: Courier Auto Entry. Ready for production? Start from Pricing.
Next steps for RedX + WooCommerce
Launch checklist: RedX API token/key saved → connection test passed → warehouse mapped → test parcel delivered → fraud checks enabled → notifications live → bulk limited to confirmed orders.
Related guides: Courier Auto Entry (daily flow), WooEasyLife mobile app (confirm on the go), COD return reduction (RTS control), English WooCommerce guide (full playbook). Bangla mirror: RedX courier guide.